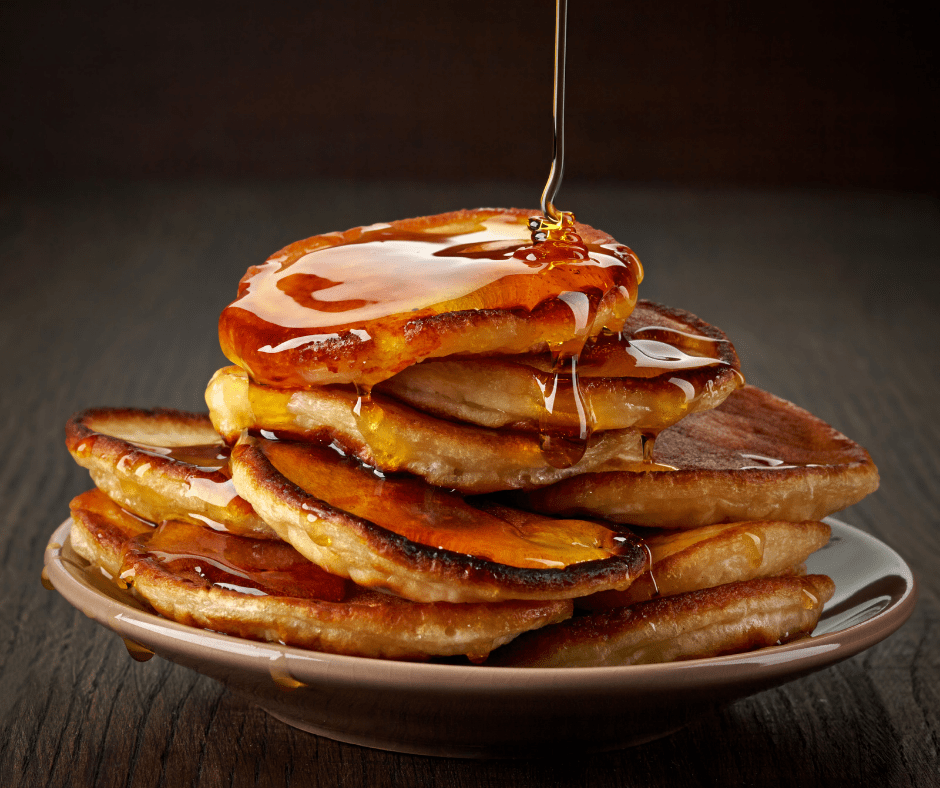
We all love Maple syrup! Breakfast isn’t quite the same without it. There is a lot of history and legends surrounding the creation of Maple syrup. We know historically that syrup was first invented by North American indigenous tribes, but many debate over who was the first.
To make maple syrup, natives put the sap in wide, shallow bark vessel and left it out to freeze. This would separate the water from the sugar, and they would then remove the ice. As time went on, new and improved ways to process maple syrup emerged. Native Americans started building syrup bowls where they would boil the sap with hot stones. When European settlers arrived, they boiled sap in large pots over an open fire to make syrup. To this day many North American tribes still participate in making Maple syrup and sugar as the country Canada is known for it!
Other Sources
Maple sap contains the highest sugar content which is why it is the preferred choice of tee to use for making syrup. However, there are many different trees that can be tapped and used the same way.
Tappable trees
~Maples
~Hickories
~Pecans
~Sweet birches
~Sycamores
~Walnuts
What differentiates these trees from one another, is the sugar content.
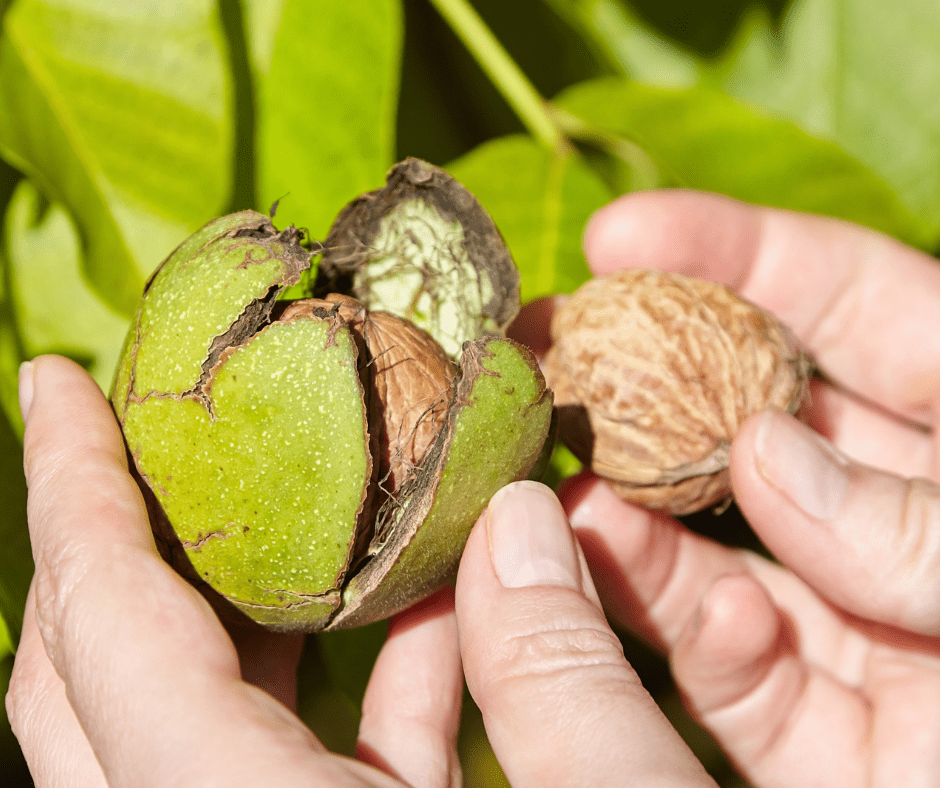
A good way to explain this is through the quantity of sap it takes. It takes 40 gallons of maple sap to produce one gallon of finished maple syrup. It takes 60 to 70 gallons of walnut sap to produce one gallon of finished walnut syrup.
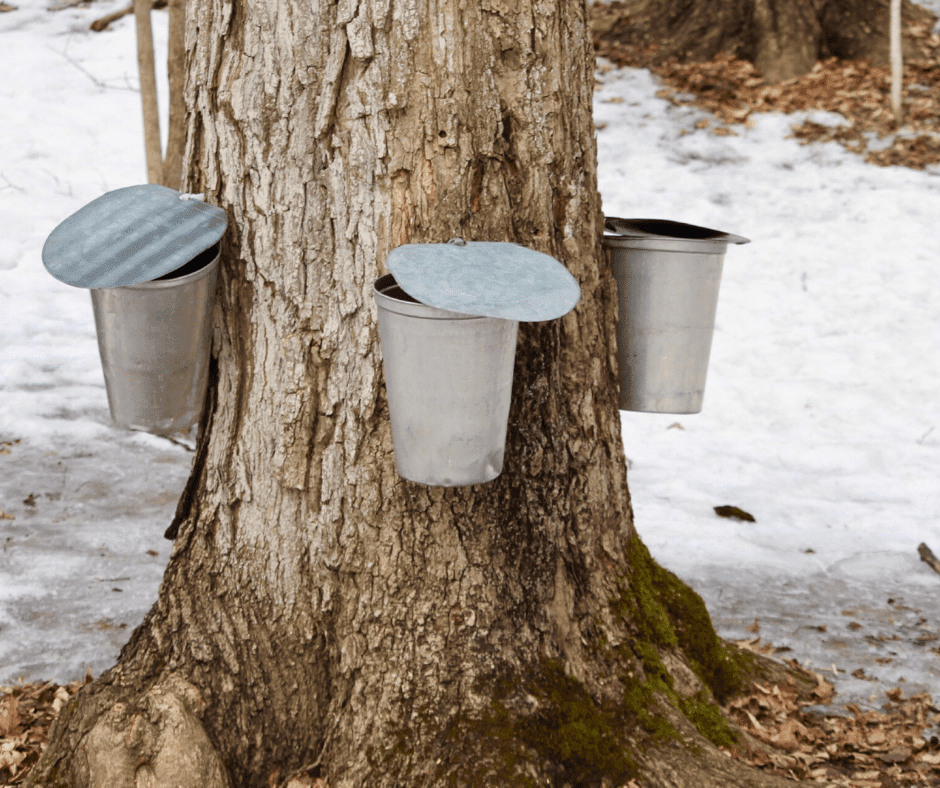
The process of tapping trees and making syrup however is all the same no matter what tree you are using. The main concern is sap storage. You must have somewhere refrigerated or cool to store the sap until you have enough gallons to make it worth your while. Otherwise it will spoil and your hard work will go to waste.
We have been lucky over the years to have snow outside during the sap flow, so I usually buy food grade buckets and bury them in the snow. This keeps the sap refrigerated until we’re ready. If you don’t have an outdoor space that is cool enough, you can buy containers and fill up your freezer and refrigerator. Again, if you are tapping walnut trees you’re going to need at least 60 gallons of sap to get one gallon of syrup.
Supplies Needed
The process of tapping trees is quite simple and you only need a handful of supplies to do it.
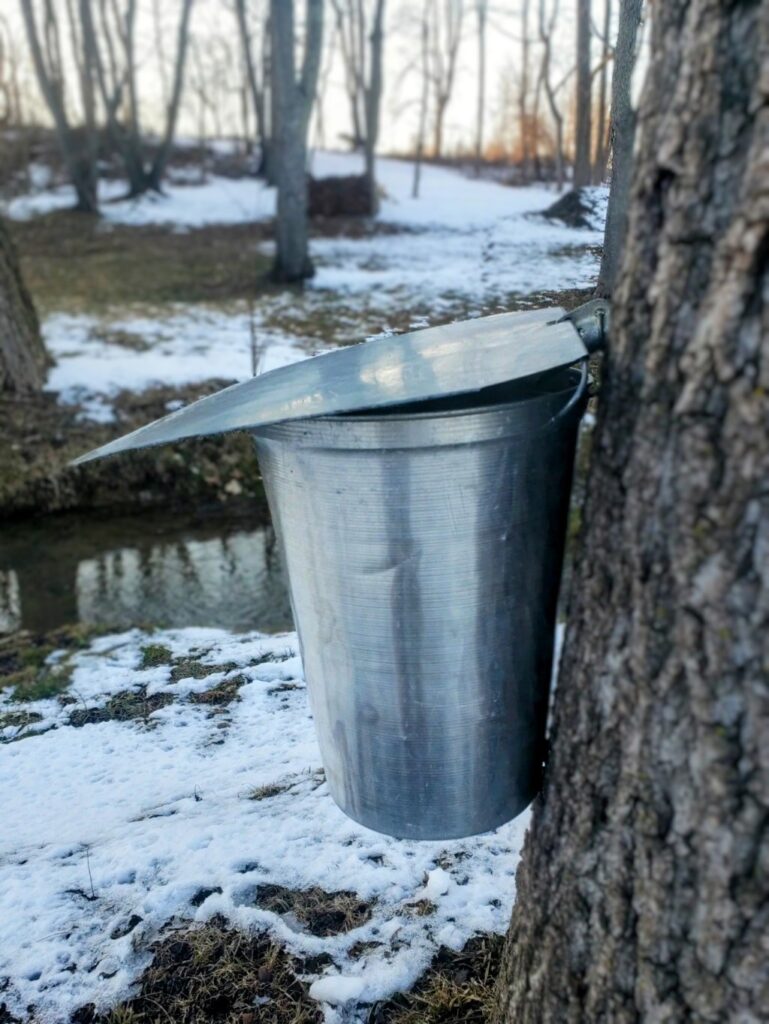
Spiles: these are the metal spouts that you tap into the tree that lets the sap flow into your bucket. You can buy spiles online, or at hardware stores in traditional sugaring areas. They cost around $5 each and there are many different types of spiles available.
Buckets to collect sap
7/16 drill bit and non-corded drill
Rubber hammer to tap the spiles into the tree
Sap storage buckets (food grade)
When to start tapping
The best time frame to start tapping is when the temperature during the day starts getting above freezing, but the nights are still below. In Western Maryland where I am, this occurs in February or early March.
How many taps? You can put one tap in any tree that is at least 12 inches in diameter. For each additional 6-8 inches of diameter of tree, you can add another tap, up to 4 per tree. Tap the trees about 2 feet off the ground (the closer to the ground, the more sap you get).
Keep the taps about 1 foot apart and don’t use more than 4 per tree. You’ll get the most sap on the south side of the trees (where the sun warms the tree the most).
Instructions
Drill 2.5 inches deep into the tree at a slightly upward angle, so that gravity helps the sap flow into the bucket. Insert the spile into the hole, and tap it gently into the tree with a hammer. It needs to be deep enough that it will stay in, even when it’s holding the weight of a full bucket of sap. If you tap on it too hard though, it will split the bark and sap will leak out. Hang your bucket and place the lid. This way it lessens the amount of debris that will enter your bucket.
Nature’s Energy Drink
Usually the first bit of sap I collect, I drink as is! Tree sap from edible trees, of course, is edible, and you don’t need to turn it into syrup to use it. Sap is considered a spring tonic. It helps to nourish your body with fresh nutrients and electrolytes after a long winter without fresh food. Sap is high in anti-oxidants and tastes like spring water with a hint of sweetness. It also gives you energy!

Let’s Make Walnut Syrup
Once we have enough sap collected, it’s time to make syrup. Because it takes such a large amount of sap to make syrup, and boiling it down is no quick process, most people prefer building homemade contraptions to cook it outdoors. The main goal is to boil down all the sap until you’re able to fit it in one pot.
We built a homemade wood-stove cooker using cinder blocks and catering chafing dishes. This gives me three chambers to cook sap. It also gives me options to transfer sap from one dish to another, making sure to cook it evenly.
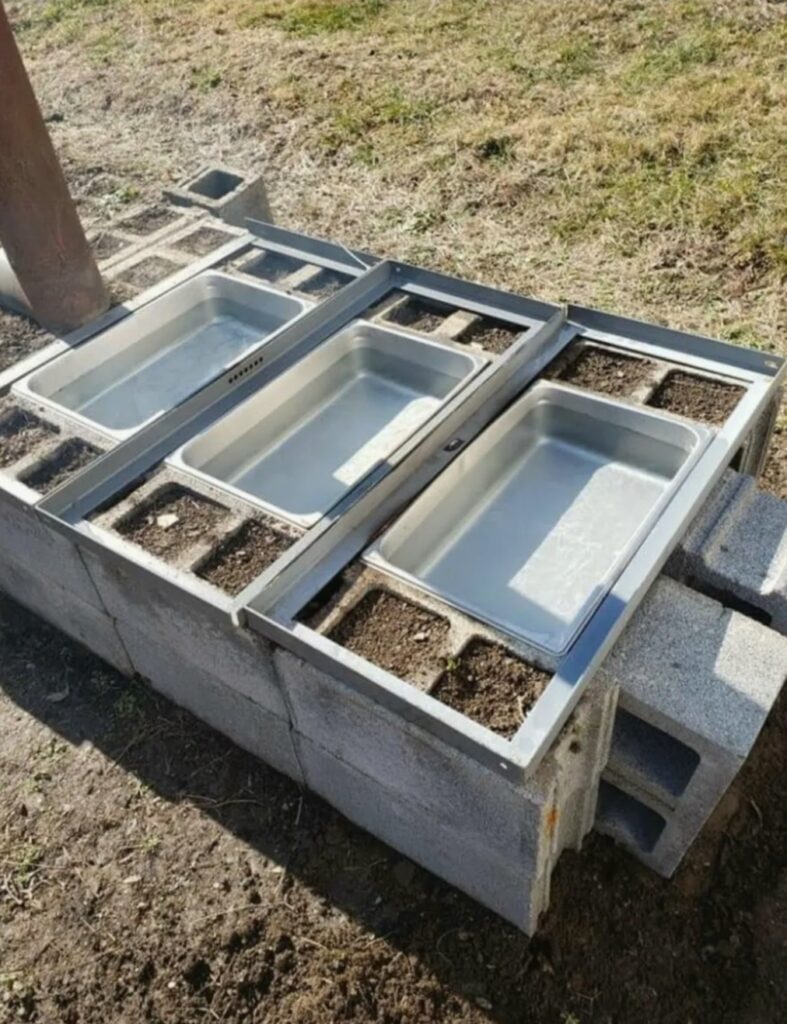
Supplies
~At least two large pots
~A stove to boil down the sap
~A candy thermometer (which can read up to 225° F) is helpful for telling when the sap is done boiling. These can be bought wherever kitchen supplies are sold.
~Fine mesh strainer
~Cheesecloth
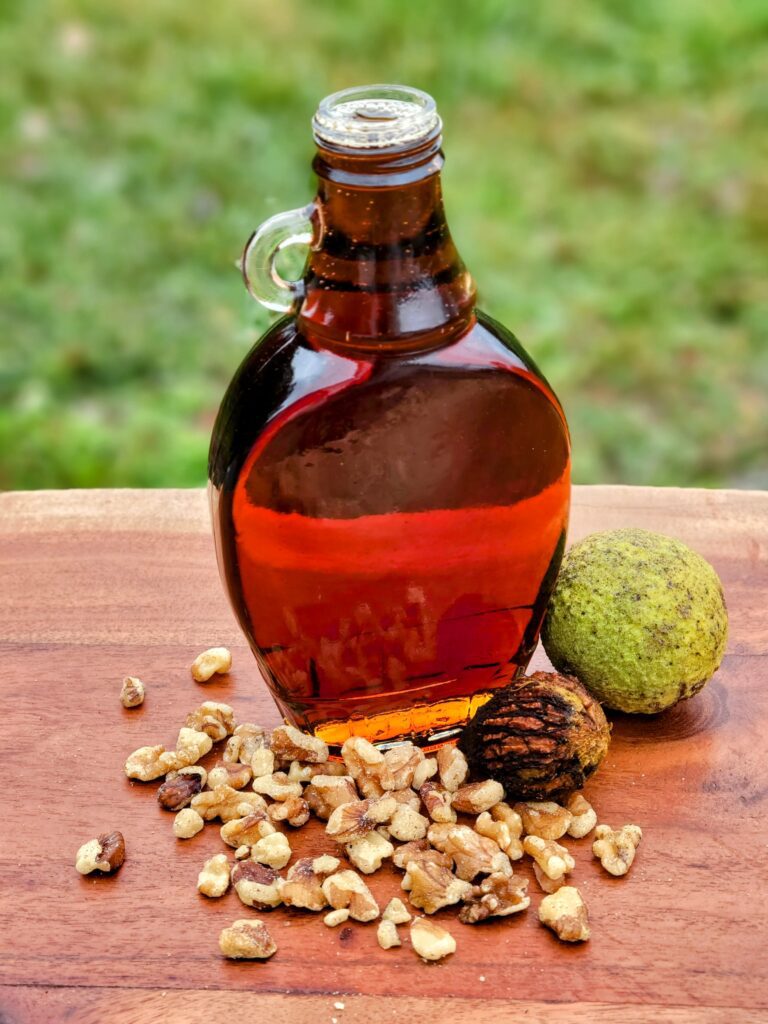
~Glass bottles or Mason jars
Directions
To begin the process I get a fire going under my cooker and fill my 3 chambers with sap. You want to bring these to a rolling boil. This has a tendency to overboil as well as create steam that is sticky. Both great reasons to do this outside.
As my sap boils, I use my handheld mesh strainer to strain any debris and leaves that may have fallen in. I also use a large ladle to transfer sap that has boiled down quicker, to a different cooler chamber and vice versa. As the chamber’s boil down, I add new fresh sap from my buckets until it’s all added to the chambers. This process takes all day. I continue to cook it down until it all fits in one chamber. When one chafing dish is full, I transfer this to a stainless steel pot and take in the house to finish. Last year I actually had two large pots.
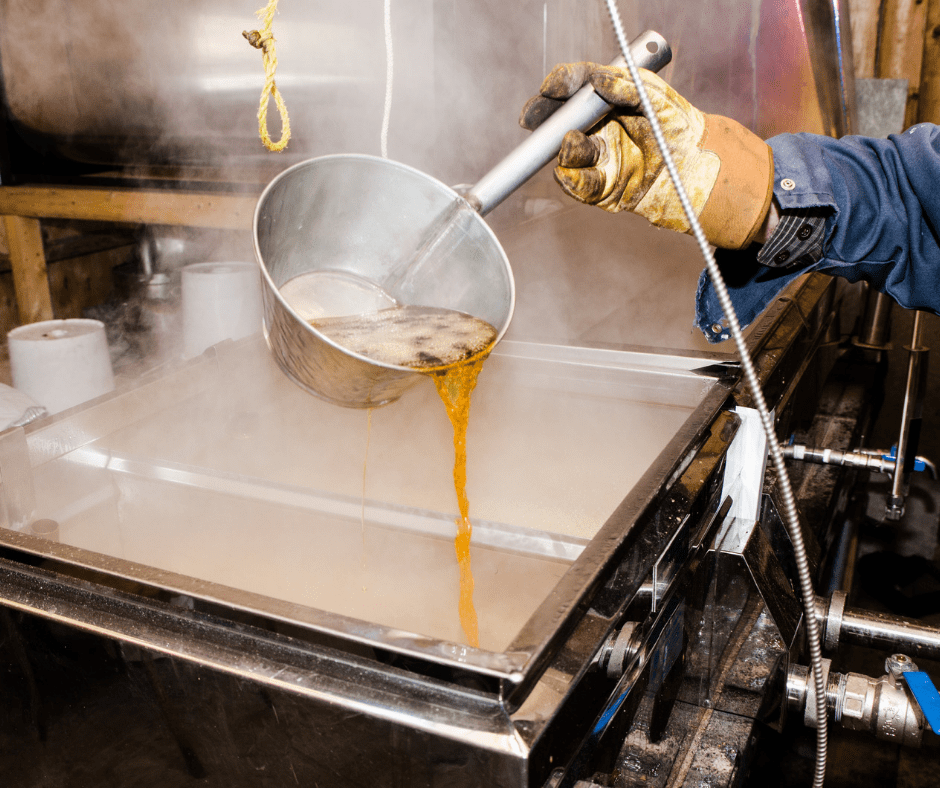
Now that we only have one pot, it’s easier to control the heat on a stove top. If it’s too late in the evening at this point, you can place this in the refrigerator again until you’re ready to finish cooking it down. When ready, boil the sap slowly over a low heat. At this stage, you don’t want to see any bubbles boiling in the sap, but you do want to see a lot of steam rising from the pot.

If you insert a candy thermometer, most sources say sap is supposed to be safe for storage (it won’t spoil) when it’s reached 7° above the boiling point of water. The boiling point of water is 212° F at sea level, but varies at different altitudes. The other way to tell if the syrup is done is by paying attention to how thick it has gotten. If you dip a metal spoon into the sap and it runs off quickly, it’s not yet done. If it drips off slowly, you’re closer. If it hangs there and creates a bubble without dripping off (called aproning), it’s definitely done.
This also depends on preference. Some people like a really thick syrup and some prefer a more thin.The thicker it is, the less finished amount of syrup you will have. When you decide it’s done, you can filter it through a cheesecloth. If it’s extremely thick, you can purchase syrup straining cloths for thos purpose, but honestly they take forever to strain. If you’re not trying to sell your syrup, filtering isn’t absolutely necessary. If you don’t filter, you may notice sediment collecting at the bottom of your syrup jar. This is called sugar sand. It doesn’t hurt anything, just stop eating the syrup when you get to that part as it may taste gritty.
Storage: Syrup will last up to 6 months to a year or longer in your refrigerator. You can also can in a water bath canner for a longer shelf life.
Final Thought
Most people that taste walnut syrup end up preferring it over maple. It has a nutty, sweet earthy flavor that really has no comparison. I have enjoyed making homemade walnut syrup for years and use it in in many recipes not just for breakfast. Recently I made forest brined grilled quail with homemade walnut syrup glaze and it was amazing!
When you have a whole world full of edible delights, the possibilities are endless! Check out the video below for the entire process on how to make black walnut syrup.
Stay Wild
Kayce Heister
Kayce is a Clinical Herbalist, Naturopathic Practitioner (HHP), Active Forager, Wild Food Chef and Mother of three. She has spent the last 20 years practicing herbalism and natural health, and spends most of her time educating others on the amazing potential the natural world can offer.